Celebration!U.S. military vehicle H...
17
06
Celebration!U.S. military vehicle Hanvy repair is completed!It was leaking, but it was finally over
I will reassemble parts
The repair of Hanvy's oil and coolant leak is finally over.Remove the radiator, remove the fan, remove the belt and pulley, and finally reach the point of the problem.Clean the parts and re -assemble.
If the parts are distorted or damaged, you will be able to order and repair parts.However, if it is caused by the deterioration of the seal material like this time, it will take time and effort, but it is not difficult to repair it.
Remove the old liquid gasket, apply a new liquid gasket, and re -assemble it.I wrote it, but I can't do it myself because it's hard itself.
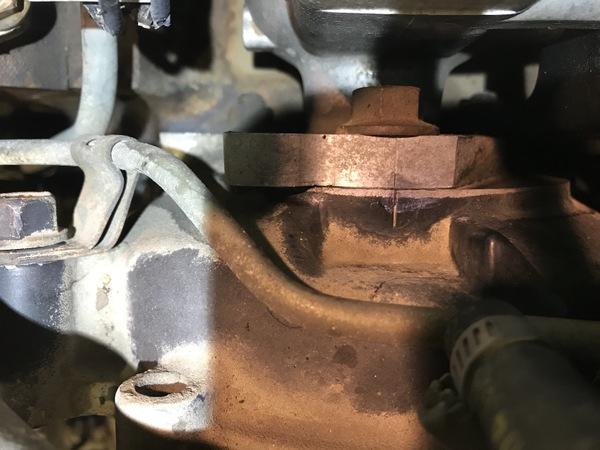
Attach the timing gear cover and fix the pump according to the position of the fuel injection pump and the timing mark of the cover.
After cleaning the parts, we will assemble in reverse order and reverse order.
First, attach the timing gear cover to the engine block.Apply a liquid gasket between the cover and the block.
Next, the fuel injection pump will be attached as it is, but if the mounting position changes, the timing of the fuel injection will change from the front.Since the timing mark that indicates the adjustment condition is checked before disassembly, it is the same position.In our case, it's just a little clockwise.It was adjusted late.
Attach the timing gear cover to the original street and attach the fuel injection pump gear matching the mark according to the pump drive gear mark.
The fuel injection pump gear that drives the fuel injection pump is also involved in the operation timing.Because the pump drive gear that rotates the gear is linked to the piston's vertical movement, if the position of each other is shifted, the injection timing will not match the position of the piston.This is a mark for both gears, and it was removed after the same position, so it is OK to match the mark when installing.
New water pump
When the timing gear cover and the gear are restored, attach the adapter plate to the timing gear cover.
Attach the adapter plate to the original, and the water pump is new.Shiny
The water pump on the front of this plate was moving without any problems, but replaced with a new one.
The water pump has a high durability because it has a simple structure because the feathers are rotating inside, but since the timing belt and pulley must be removed to replace them, they are together when replacing the belt.It seems that it is common to replace and reduce the labor.The life of the belt is said to be about 10 years or 100,000 km, so it seems like the pump will be replaced with that.
In the case of our Hanvy, the belt has been replaced with a new one at the time of Hanvy's purchase, only 7 years have passed, and it runs only about 17,300 miles (about 27,800 km), but if it does not break down, pumps.I can't exchange, so if you want to do another opportunity, you'll get a lot of wages.It is an important part that is an indispensable part for the engine, and it does not cost 40,000 yen even if you put a hose or gasket, so we had you replace it in preventive.
Connect the hose to the water pump.The hose on the right is a thermostat bypass hose, and the left is a heater hose.Both metal fittings have become new.Attach the oil lubrication exit on the pump
There is a pipe on both sides of the water pump, and the coolant enters the engine from here.The lower left is the part that leads to the radiator's low hose.The coolant cooled by the radiator goes through the water pump from here to the inside of the engine.
The water pump also comes with a bypass hose to escape without a radiator when the coolant is cold, and a heater that is connected to the heater.Both are rubber, so they have deteriorated a little, and since they were slightly swelling, changed to a new one.After that, attach the oil lubrication port on the pump.
Completed by putting a pulley and applying the belt
Attach the crankshaft pulley to the crankshaft that was popping out under the water pump.
Attach the water pumpure to the water pump and apply a belt.I'm back to my original form
Attach the crankshaft pulley to the crankshaft under the water pump and apply the belt.There are two types of belts: a belt that turns the alternator and a belt to turn the power steering pump.Since each is double, you need a total of four.

My Hanvy is an early 6.2L non -parto engine, but it has been changed to a 6.5L turbo in an improved A2 model or a recent ECV (ECPANDED CAPACITY VEHICLE) model, and in that case with one belt.I'm turning everything.It is efficient.
After that, if you attach a fan, a fansloud and a radiator and connect the hose, the repair of oil and coolant leaks will be completed, but before that you can do another one.You have to fix the fuel leak.
Replace the fuel pump with a new one
The place where the fuel was leaked was the fuel tank and the fuel pump.It was leaking from both the stored and the place where it was sucked out.First, fix it from the fuel pump.
The fuel pump attached to the lower right of the engine is seen from below.You can see that the pipes under the pump and nearby are wet.Feeling that is leaking
The fuel wasn't hanging on the ground, but when I looked at the fuel pump from the bottom, it was leaking quite well.Although it is not a leak, the surrounding area is completely wet.
Removed fuel pump.I don't know where it's bad, but I'll replace it all
Since the fuel pump cannot be replaced with internal parts, it is inevitable to look for a broken place, so replace the whole without checking.
The second repair of the fuel tank
Next is the fuel tank.In the past, there was a fuel stain under the tank, so I had it repaired, but if I filled it up, it would leak a little.It is leaking from the top of the tank.
A fuel tank located under the rear right seat.It's wet overall
If you don't fill it up, it's okay, so when you refuel, you've stopped it after auto -stop, but at the time of the previous vehicle inspection, it was found that the tank was wet, and I was told to see the situation from time to time.。
Then, even though it is not full, I will be able to stain again recently.So, it was a good opportunity, so I decided to have it repaired again.This is because it is difficult to remove the fuel tank.
Remove the fuel tank to repair.This is a pretty tough task
The fuel tank itself can be removed as soon as the piping or sensor can be removed, but the problem is attached.You can't access without removing the rear propeller shaft that drives the rear wheel.
This time, there is no other maintenance to attach and detach the propeller shaft, so the wage does not change even if it is repaired by the tank alone, but it takes time for the repair content.Therefore, if it takes time to repair it anyway, it would be better to have it done together.
Access cover on the top of the tank.Where this surroundings are suspicious
There is a black panel called an access cover on the tank.The fuel tank is like a polytank, but it is only metal, and it is necessary for tanks, such as fuel piping, fuel gauge sensor, lines where excess fuel returns from fuel injection pumps, and vent valve that misses pressure when internal pressure rises.Things are attached.
You can see that the gasket is sandwiched between the access panel and the tank body.
The fuel tank is, of course, a highly sealed degree, so a gasket is sandwiched between the access panel and the tank itself.It seems that this gasket deteriorates and fuel leaks often occur.I was leaking from here before, and the seal was redone.
Remove the bolt that fixes the access panel
A crack on the gasket around the bolt.This is completely the cause
When I removed the access panel, the gaskets around the bolts were broken in some places.It is natural to leak this.I don't know if the deterioration of light oil is severe or because of vibration, but I wish I could make it a slightly durable material ...
Wipe off the leaked fuel and attach it.The rear propeller shaft has been removed and the transfers are exposed.The cord of the sensor is hanging
Since there is no leak from the tank itself, replace the gasket and restore it.That's it for repairs, but it takes time and time to put on and take off, so I hope it will not leak anymore.
Anyway, all of this is now complete!
The article was long, but there were no stocks of some parts and I ordered it from the United States, so it took a lot of work time.
But I'm glad I noticed that this was leaking.It was good because I happened to look under Hanvy and found a stain, but even if something leaked a little, it was hard to notice because it would not get sick unlike a clear breakdown.It could be a big deal if I was running around.I don't want it to leak anymore, but I will continue to check it out in the future.
By the way, I asked you to check the power generation voltage.No problem with 27.96V
Yes Yes.The display of the voltmeter was low before and the meter was replaced, so I asked them to check the power generation voltage.The result is about 28V.It is perfect.It seems that you can ride with confidence for the time being.I hope there is nothing in the next vehicle inspection.


